Have a Question? Email me at nestyourbestblog@gmail.com I'd love to hear from you!

Thursday, March 21, 2013

Happy Birthday Little!


Happy Birthday Little Man!  


I cannot believe you are 4.  It seems like only yesterday you were crawling around and learning how to feed yourself puffs.  Now, you eat 3 full meals a day and about 3 more full size snacks!  You are growing like a weed and making it hard for momma to keep you in shoes and pants!


Daddy and I could not be prouder of you.  You live life to the fullest and do everything with joy.  You love everyone you meet and never hesitate to show us how much you love us with special drawings, cards, and rocks  you've collected.


You are smart as can be.  You amaze me everyday with what you know about meteors and power lines, and sea creatures.  When you are fascinated about something, you want to know "everything about it".  I love that about you.  You stump me with your questions, but I love your curiosity.  You and George would be the best of pals. ;)


You're an amazing artist.  You love to cut and glue and use markers till your hands are multi-colored.  I wonder where that comes from?  I can't wait to see what you do with all of your talents.


We really thought you'd have a sibling by now, but you know what?  God's given us a little extra time with just you, and how special this time has been.  We've been to movies together.  Sampled cake pops, walked on the beach, flown in an airplane, gone to the zoo, picked apples, and pumpkins, and flowers. Watched you experience your first day of school and hit your first baseball, and eat a lemon all the way to the peel. Yuck!  We wouldn't trade this time for anything.

And if our little family stays only three, you, my love, are enough.  More than enough.  Just right.

Little, we love you so much!  Although I end every day exhausted, I also end every day happy God gave me the opportunity to be your mom.  Keep asking questions, keep growing, keep exploring, keep drawing, and never let anyone or anything hide your light.

Love,
  Mommy and Daddy

Wednesday, March 20, 2013

Dino Party - The Mantle

I promise this is the last post on the Dinosaur Birthday Party.  There were a lot of parts!  It would have shut my blog down if I'd put it all in one post...hope you don't mind! :)

I told you yesterday I love to set the table first for any party or holiday event.  Second, the mantle.  These are just the natural places I go to add a touch of whatever festivity we have happening.


I used a Target garland to start and then shopped my house for the rest.

The wicker vase is from Big Lots and I filled it with curls of the same wrapping paper I used to run the dining table (you can see that post yesterday).

The dino is a DIY attempt out of poster board and markers.  I think he turned out okay!

I had the graphic already and I think it was from Pinterest.  


My Mister's aunt gave us the cute dino cookie cutters.  After I baked all the cookies, I used the cutters to spice up the mantle.  I love the extra texture they add.


The two yellow candle holders are from Kirland's and I made the chalk quote bubble out of poster board and chalk spray paint.


It was a fun and spirited way to great our guests and pay special tribute to my favorite little dinosaur!

Do you see the blue painter's tape holding up the bubble?  We had some difficulty!
I hope you've enjoyed the dino series.  I am officially dinosaured out.  It was a blast and it sure made Little happy and that's the whole point!

XO,
  Sara

Tuesday, March 19, 2013

Dino Party - The Table

The first thing I do when planning a party is come up with the theme and/or colors.  Then...the table!  I love to set the table first because it sets the tone for the rest of the party and usually takes me in a direction I hadn't anticipated going.

I thought it would be fun to seat the kiddos in the dining room for Little's 4th Birthday party.  They thought it was pretty cool to be at the big table while the mom's ate in the kitchen.

I started by using a roll of wrapping paper from the Target $1 spot for the runner.  I also used some of this paper for the juice box covers.


Next, I used two of Little's favorite toy dinos as a focal point, some flowers and a birthday balloon.  Because how can you not have a Happy Birthday balloon at a child's birthday party?!

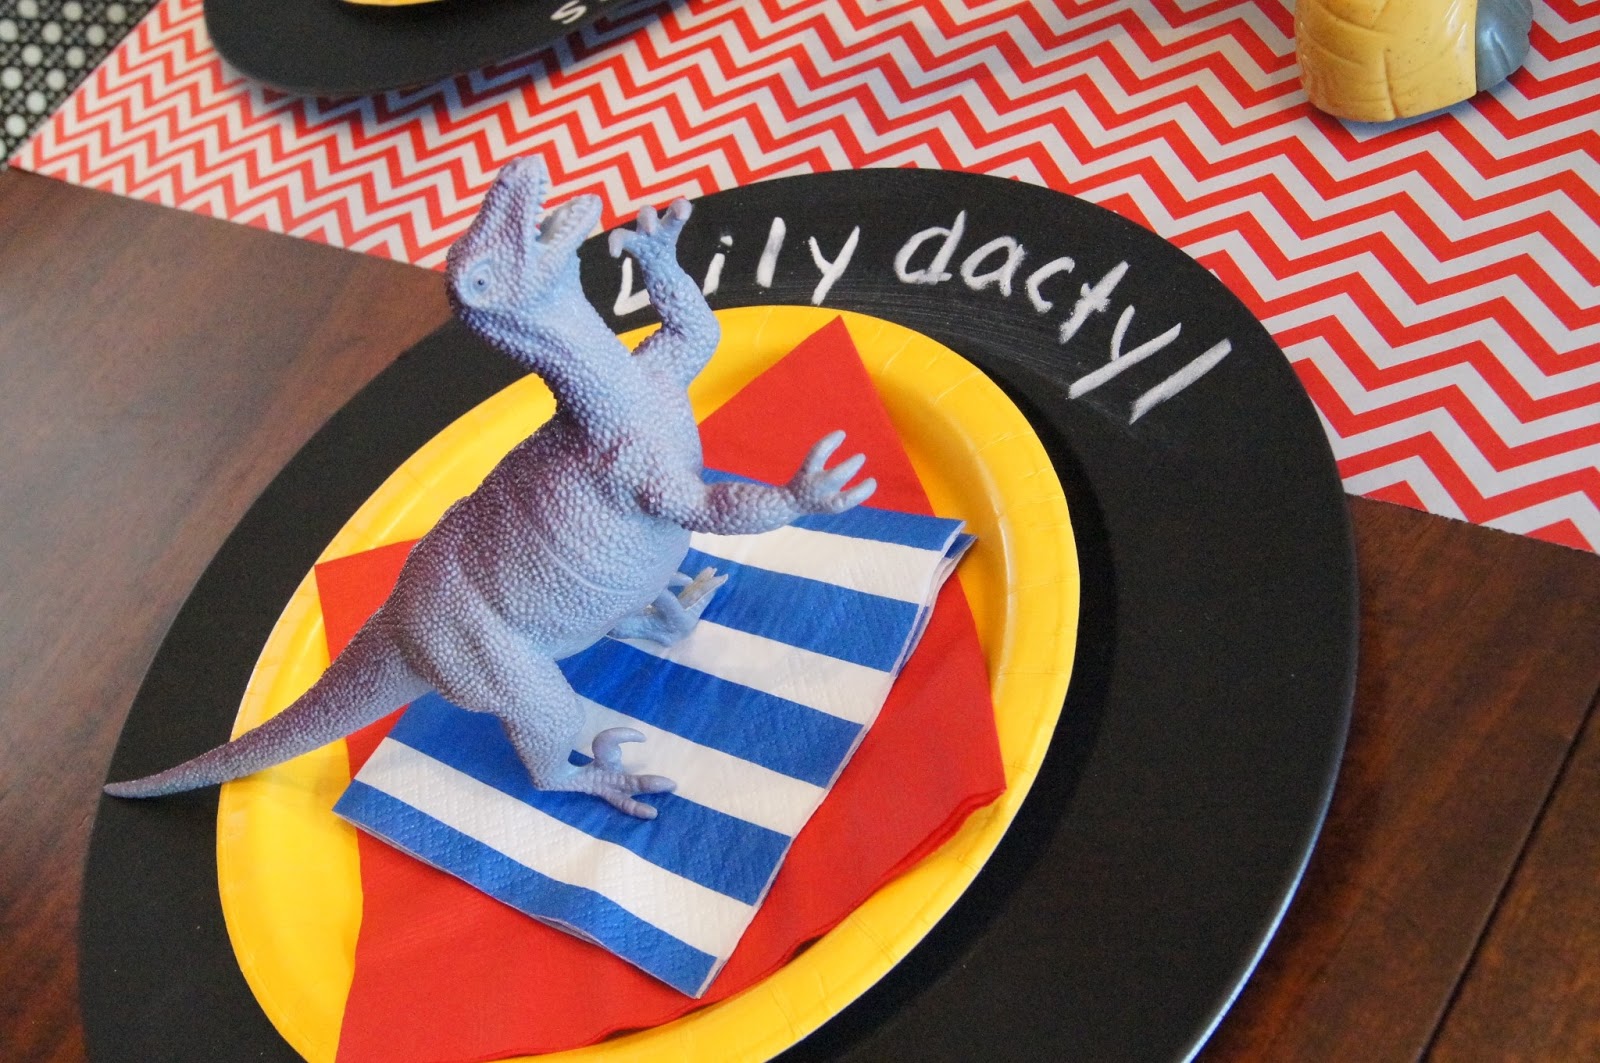
Last spring I DIY some chalkboard chargers.  These were the perfect place to give our guests their very own dinosaur name.


I topped each charger with a yellow paper plate, a red dinner napkin, and some very cute blue and white rugby striped appetizer napkins.  The plastic dinos were another favor the kids could take home.  They came from the Target $1 spot.  Got to love that place!

The whole table probably cost me $15, with the cost of all the dinosaurs and the flowers.  Not bad for a very cute, very festive table!


The little ones sure seemed to like it...


Up next, the mantle.  Then I promise I won't bore you with my dinosaur birthday party anymore!

XO,
  Sara

Monday, March 18, 2013

Dino Party - Decorations


Welcome back!  I hope everyone had a great weekend.  We were running all over with baseball, but I wouldn't have it any other way.  Did I tell you my Little Man was awarded the game ball after his very first game?!  So proud!


Last week I revealed the Dinosaur Party we had for my son's 4th birthday.  Wow.  Four.

If you missed any of that, you can find the cookie favors here, menu here, and volcano cupcakes here.


Today I'm sharing the decor.  It was pretty easy and very DIY.  I started with some clearance Target party pennant banners.

I have three so I used them in the entryway...


In the dining room...

and on the mantle.


On a whim, I decided it would be fun to make giant dinosaurs.  I bought big white poster boards and drew a T-Rex, Triceratops, and Brontosaurus on them.

  To tie them in with the fun patterns on the pennants, I rugby striped and polka dotted them in coordinating colors.  I was pretty happy with how they turned out!


Two dinos stood on the dining room hutch to welcome out little guests.


The T-Rex took over the mantle.


Once the dinos were up, I felt they needed to a little something.  Actually, I felt they needed to be saying something, so I used some leftover poster board and made three quote bubbles.  Then, I spray painted each bubble with chalkboard paint.

The Tri and Bronti say "Roar!"  and "He's 4!"


Rexxy says "Happy Birthday Japhasaurus!"


They were very easy, and made a great impact.  And, they're reusable!

Of course, I had to pull out my balloon wreath again.


 I just changed the circle label to say "Happy Fourth Birthday".

Fresh flowers are always a must for any party.  I got mine at Kroger and split them up to make 2 bouquets.  I had the vases already.


Little absolutely LOVES balloons.  Actually, I've never heard of anyone who loves them more than he does. So, naturally we had out own balloon tank and blew up a ton of balloons.

 We also took a trip to the store where he got to pick out his own Dino balloon.  Very exciting.


Tomorrow, I'll break down the birthday tablescape I put together, as well as the birthday mantle.

See you then!

XO,
  Sara

Friday, March 15, 2013

Dino Party - Volcano Cupcake

The last few days I've been sharing the details of my son's dino party.  If you've missed any of those posts, check out the cookie favors here and the party menu here.

Today, I'll be showing you what I came up with in a moment of desperation for the cupcakes.  You know you can't have a child's birthday party without cupcakes!


My first thought was just to make regular cupcakes and pop a little plastic dino on top, but I knew I could do better.  Hmmm...  It was actual Little who gave me the idea.  "Volcanos Mommy!"  Why son, I think you're on to something.

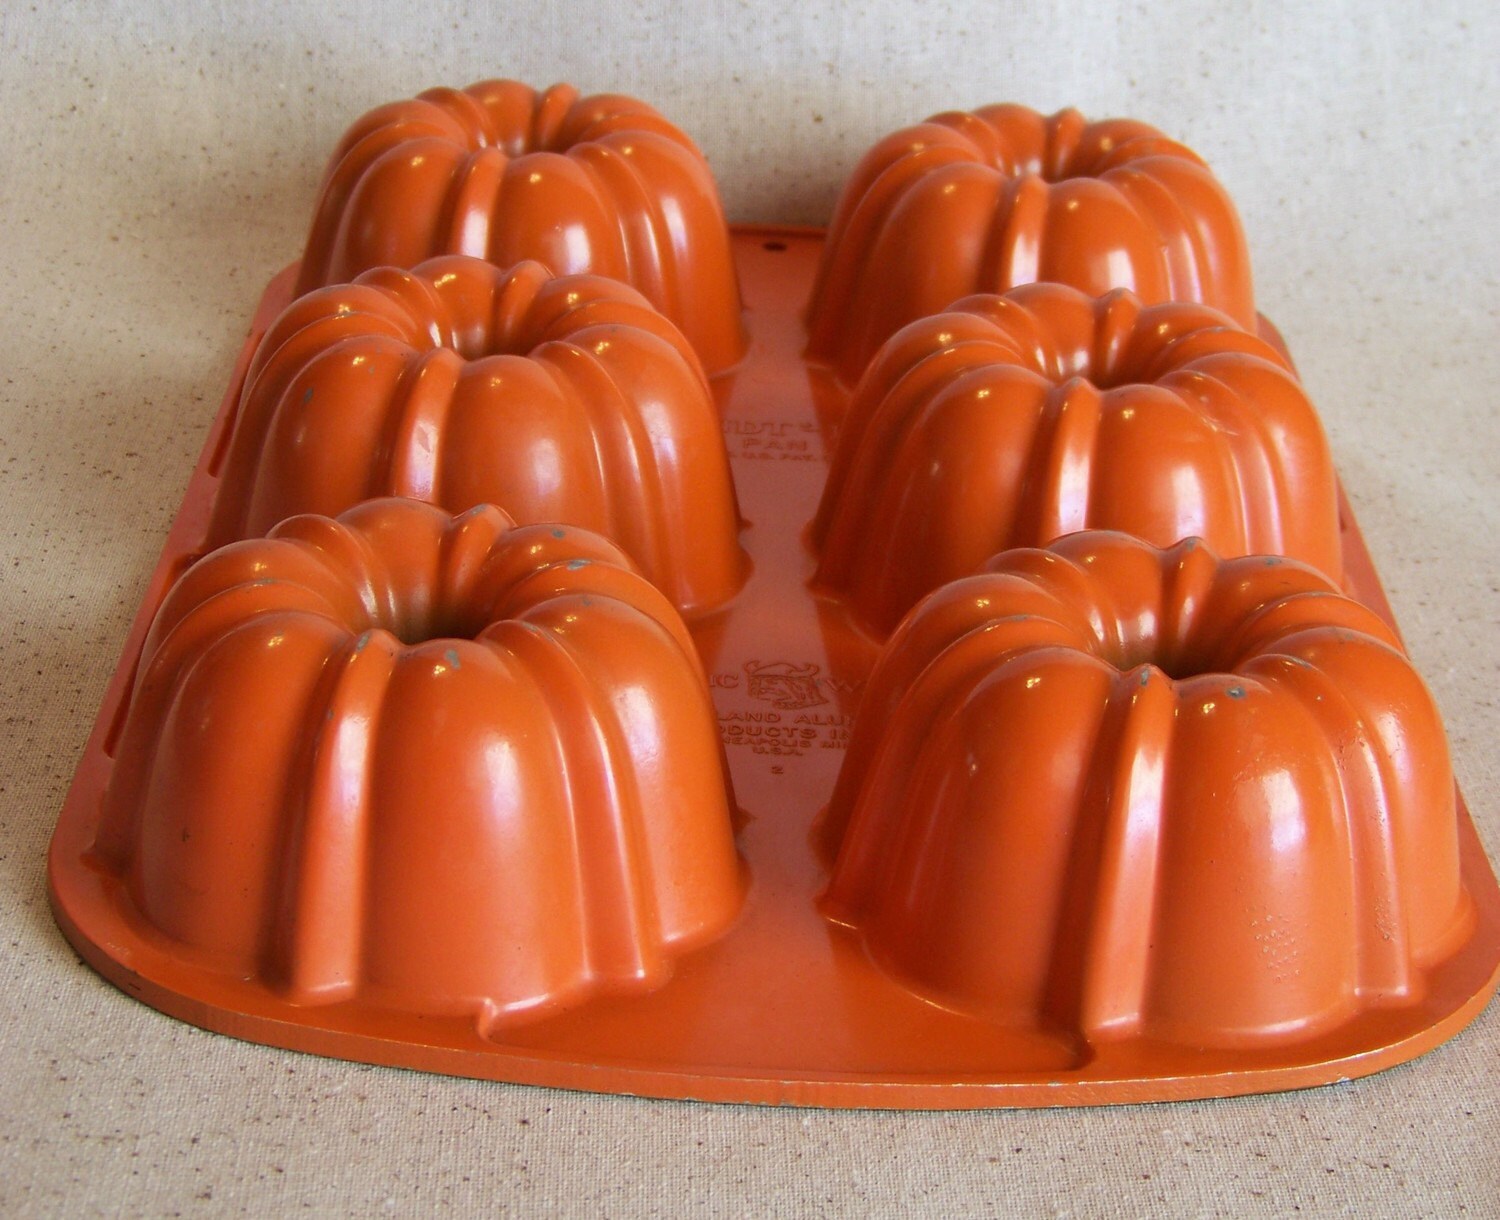
I found a recipe for lava cakes filled with melty chocolate, however, this is not what I needed with a bunch fo preschoolers!  I just made chocolate cake and bakes it in a mini bundt pan.  The little bundt cakes resembled volcanos enough...


The tricky part was getting the lava.  The lava cake recipe provided a recipe for a glaze, which I tinted with orange food coloring.  However, when I tried it out, it was not nearly opaque enough to look like anything.  This mistake worked out though, because the glaze sunk into the cake and made them extra moist and flavorful.

* Disclaimer: I absolutely HATE the word "moist", however, since it is in written form here, I'm writing it and moving on.

I wound up adding some powdered sugar, a bit of corn syrup and a little more orange coloring.  The result, a volcano cupcake fit for an almost 4 year-old.


I stuck the dinosaur toppers from the Meri Meri dino cupcake kit on top and we were in business.  The kids loved them and the parents thought they were delicious!


We made a little family version too!


I'll try and tell you my icing recipe below.  You may have to play with it a bit.  (I doubled this)

Melt 2 tablespoons of butter, 1/4 cup of sugar and 1/8 cup of milk in a sauce pan.  Let it come to a boil and then remove from heat and stir in 1 cup of white chocolate chips till melted.  Pour over cakes.

This is the part that sank into the cake, but it worked out and made them delicious!  Save some icing back and then do this...

Add in about 1 cup of powdered sugar and 1 Tablespoon of corn syrup.  I also added orange food coloring.  Stir together and drizzle over cakes.  Sprinkle red sprinkles on top.

I hope this works out for you if you try it.  Remember, I was in desperation mode!  If it's too thin, add more powdered sugar.  You can't really mess it up.  It will taste delicious!

Have a great weekend friends!  Next week I have a few more party things to share, as well as my Easter mantle and tablescape.  It will be here before you know it!

XO,
  Sara


Thursday, March 14, 2013

Dino Party - The Eats

What's a party without food?  If you've been reading the blog, you know we recently had a Dino Party for my son's 4th birthday.  Yesterday, I shared the cookie favors we put together.  Today, I'm showing you what we ate.

When I started planning this party, of course, I went to Pinterest first.  There was lots of dino stuff, but it all referred back to Etsy sites where you could buy dino cookies, juice box wrappers, banners, etc.  I have nothing against Etsy, I just wanted to make it myself to save a little green!

I made these little labels to hang above the food stations in my kitchen. I just used the Drawing Board feature in Word to create these labels.

At the "Carnivores" station we had dinosaur shaped chicken nuggets for the kiddos and a hot cider salad with bacon and mini honey cornbread muffins for the mamas.

Unfortunately, I didn't get pictures of all the food because at that point, we were in full party mode!


The "Herbivores" station had broccoli and carrots with ranch, strawberries and grapes, and popcorn.


"Sweetivores", my favorite station, had cupcakes (check back tomorrow to hear more about the cupcakes) and cookies.


With all the yummy food, we needed something to wash it down.  That leads to the "Prehistoric Punch" station.


To cover the juice boxes I used yellow scrapbook paper and red and white chevron wrapping paper from the Target $1 section.  I scoop up those rolls whenever there are new ones!

I think part of what makes a memorable party are the little details.  If you've committed to a theme, try to keep it running throughout the party...of course, you don't want to go overboard, but a few little touches can easily take some Target party plates and chicken nuggets from drab to fab.


Popular Posts