My little man had a blast picking pumpkins, riding the hayride, and jumping in the bounce house.
Just had to share a few cute pics!
This pumpkin fell over right after he gave it a hug. Oops! Luckily, no breaks!
How cute is this little guy? Okay. I'm a tad biased.
Okay, back to the post! This week, Little J helped me make a new wreath for the front door. I was inspired by an image I kept seeing on Pinterest, but when I tried to click through, I could never find it! Oh, well. A bag of moss, a wreath form, and lots of hot glue sticks yielded a needed upgrade to my tired old wreath.
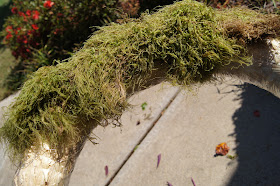
Pull out a chunk of moss and spread it out, loosening it up to wrap around the wreath. Please do this outside! Moss is mega messy...I also chose to do this on the windiest day thus far, so watch your eyes too. This stuff blows around!
Simply spread some hot glue on the wreath and wrap away. Cover the wreath with big pieces of moss and then go back and fill in any sparse spots.
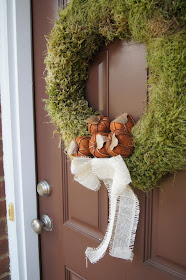
Here is my wreath before I glued the pumpkins on.
I love the texture and natural look.
The package came with 6 pumpkins, but I only used 5. I think things in groups should always be in odd numbers. Maybe that's just me?
Really get to gluing here. I mean, lay it on thick! I put some glue directly on the wreath and some on each pumpkin. Then I squeezed some glue between the pumpkins so they could cling to each other.
Aren't they cute?
The next step is to attach some burlap ribbon. You could use brown if you'd like, but I have a brown door, so... (one day it won't be brown anymore ;)
I just looped some pieces of the ribbon and folded over the ends to make tails. There is no actual knot in this bow.
Then, I secured the bow into the wreath with dress pins. If you have longer pins, I recommend using them. It's kind of tough getting through the ribbon and all that moss! You could also hot glue if you wanted.
I really wanted the oatmeal burlap ribbon, but I went to 3 stores and everyone was out! So, I bought the only spool I could lay my hands on at Hobby Lobby. I planned to dye it in a pot of black coffee, but after trying it out, I kind of like the off-white look.
What do you think?
Well, there you go. 20 minutes later, a wreath that makes me proud to welcome guests! Have you made anything to spruce up your home for Fall?
Enjoy your weekend friends! We are headed to a costume party this weekend. I'll have to share some pics next week...if I dare! I'll also be continuing our Home Binder quest and jumping back in with the "Holidays" section. Just in time, eh?
XO,
Sara


No comments:
Post a Comment